Irish Soda Bread

Soda bread is a soft textured cake like bread that rises due to the reaction of the acid of a liquid like buttermilk, and a base like baking soda. 

Although the Irish didn’t invent Soda Bread it is most often identified with them. The “soft wheat” is the only suitable flour that can grow in Ireland’s climate, and when mixed like a traditional dough it doesn’t form any gluten like a traditional yeast bread, it does work well with a soda bread recipe.

The Idea of using soda to leaven bread was done by the American Indians centuries ago, where they used pearl-ash or Potash (a natural soda in wood ashes) in their breads to make them rise.

The cross on the soda bread has several explanations, Legend has it that folks did it to “let the devil out” while it’s baking for good luck, and others say that it made it easy to divide into 4 pieces. It was also a symbol for a cross during Christian holidays.
Irish Soda Bread

 
Ingredients
  • 4 to 4 1/2 cups flour
  • 2 Tablespoons sugar
  • 1 teaspoon salt
  • 1 teaspoon baking soda
  • 4 Tablespoons butter
  • 1 cup raisins
  • 1 large egg, lightly beaten
  • 1 3/4 cups buttermilk

Method

1 Preheat oven to 425 degrees. Whisk together 4 cups of flour, the sugar, salt, and baking soda into a large mixing bowl.

2 Using your (clean) fingers (or two knives or a pastry cutter), work the butter into the flour mixture until it resembles coarse meal, then add in the raisins.

 3 Make a well in the center of the flour mixture. Add beaten egg and buttermilk to well and mix in with a wooden spoon until dough is too stiff to stir. Dust hands with a little flour, then gently knead dough in the bowl just long enough to form a rough ball. If the dough is too sticky to work with, add in a little more flour. Do not over-knead! Transfer dough to a lightly floured surface and shape into a round loaf. Note that the dough will be a little sticky, and quite shaggy (a little like a shortcake biscuit dough). You want to work it just enough so that the flour is just moistened and the dough just barely comes together. Shaggy is good. If you over-knead, the bread will end up tough.

4 Transfer dough to a large, lightly greased cast-iron skillet or a baking sheet (it will flatten out a bit in the pan or on the baking sheet). Using a serrated knife, score top of dough about an inch and a half deep in an “X” shape. The purpose of the scoring is to help heat get into the center of the dough while it cooks. Transfer to oven and bake until bread is golden and bottom sounds hollow when tapped, about 35-45 minutes. (If you use a cast iron pan, it may take a little longer as it takes longer for the pan to heat up than a baking sheet.) Check for doneness also by inserting a long, thin skewer into the center. If it comes out clean, it’s done.

Hint 1: If the top is getting too dark while baking, tent the bread with some aluminum foil.

Hint 2: If you use a cast iron skillet to cook the bread in the oven, be very careful when you take the pan out. It’s easy to forget that the handle is extremely hot. Cool the handle with an ice cube, or put a pot holder over it.

Remove pan or sheet from oven, let bread sit in the pan or on the sheet for 5-10 minutes, then remove to a rack to cool briefly. Serve bread warm, at room temperature, or sliced and toasted. Best when eaten warm and just baked.

Posted in Breads, Muffins | Comments Off

Lindy’s Famous Cheesecake

Lindy’s Restaurant in New York City was famous for its cheesecake from the early 1930s to the 1950s, when owner Leo Lindermann died. Although Leo was supposedly the only person who knew the secret recipe, Lindy’s is still open and still serves cheesecake. This recipe isn’t likely to be the exact original, but it does make a similarly rich and impressively tall cheesecake, sized for a crowd. For purists, serve the chilled cheesecake just as it is. For those who like their cheesecake with fruit, just before serving, glaze the top by pouring on a bit of melted jelly or spoon cut or pureed fresh fruit over the top of the whole cake or on individual servings.

Lindy’s Famous Cheesecake

img_4536

I will bet my farm and best Tennessee mule that you will agree with me and say that this is the best cheesecake you ever had. It is to die for. In 1946, I was served this dessert at the famous Lindy’s Restaurant in New York City.

5 packages (8-oz size) cream cheese 2-1/2 pounds), at room temperature

1-3/4 cups sugar

3 tablespoons all-purpose flour

1-1/2 teaspoons grated lemon peel

1-1/2 teaspoons grated orange peel

1/4 teaspoon vanilla extract

5 eggs

2 egg yolks

1/4 cup heavy cream

1. Assemble spring-form pan (9-inches) with Graham Cracker crust.

2. Preheat oven to 500 degrees.

3. Make Filling: In large bowl of electric mixer, combine cheese with sugar, flour, lemon peel, orange peel, and vanilla.

4. Add eggs and yolks, one at a time, beating after each addition. Beat only until mixture is well combined. Add cream, beating until well combined.

5. Pour filling into spring-form pan over Graham Cracker crust.

6. Bake 10 minutes.

7. Reduce oven temperature to 250degrees. Bake 1 hour longer.

8. Cool in pan, on wire rack. Then refrigerate.

9. To serve: Remove side of spring-form pan. Serve cheesecake plain or topped with strawberries or anything of your desire.

Make 16 to 20 servings.

Posted in Cakes, Desserts, Pies | Comments Off

Vanilla Chocolate Chip Cookies

VANILLA CHOCOLATE CHIP COOKIES


photo

3-1/4 cups all-purpose flour

1 teaspoon baking soda

3/4 teaspoon salt

1-1/2 cups butter, softened

1-1/4 cups granulated sugar

1 cup firmly packed light brown sugar

2 eggs

4 teaspoons vanilla extract

1 package (12 ox.) semi-sweet chocolate chips

1 cup coarsely chopped walnuts

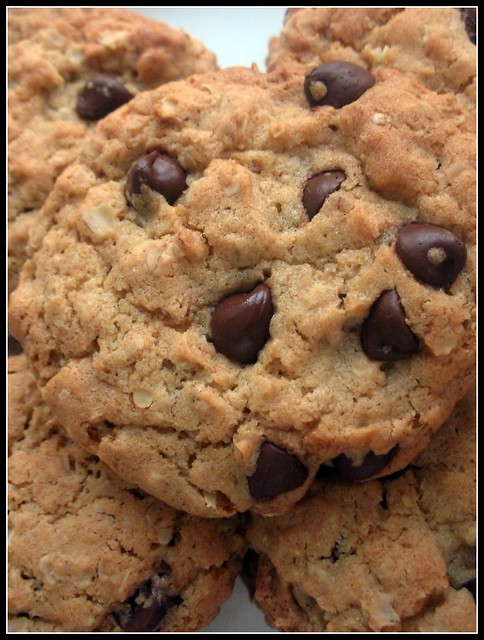
Mix flour, baking soda and salt in medium bowl. Beat butter and sugars in large bowl with electric mixer on medium speed until light and fluffy. Add eggs and vanilla; mix well. Gradually beat in flour mixture on low speed until well mixed. Stir in chocolate chips and walnuts.

Drop by rounded tablespoon about 2 inches apart onto ungreased baking sheets.

Bake in preheated 375 degree oven for 8 to 10 minutes or until lightly browned. Cool on baking sheets 1 minute. Remove to wire racks, cool completely.

Makes 5 dozen. 

Posted in Cookies, Desserts | Comments Off

Grandma’s Chocolate Cake

GRANDMA’S CHOCOLATE CAKE

Milk-Chocolate-Frosted Layer Cake Recipe

3 cups all-purpose flour

2 cups sugar

1/2 cup unsweetened cocoa powder

2 teaspoons baking soda

1 teaspoon salt

2 cups hot water

3/4 cup vegetable oil

2 tablespoons distilled white vinegar

1 tablespoon instant coffee granules

1 tablespoon vanilla extract

Preheat over to 350 degrees with rack in the center. Spray two 8×2-inch round cake pans with nonstick spray.

Whisk together flour, sugar, cocoa, baking soda, and salt in a large mixing bowl.

Combine water, oil, vinegar, instant coffee, and vanilla in a large measuring cup. Add to dry ingredients and whisk just until combined – a few lumps are OK. Divide batter between pans, then bake until a toothpick inserted in the center comes out clean, 35-40 minutes. Cool cakes on a rack for 15 minutes, then invert them onto the rack. Leave cakes upside down to cool completely.

GLOSSY CHOCOLATE ICING

1 stick unsalted butter

1-1/2 cups sugar

1-1/4 cups unsweetened cocoa powder

Pinch of salt

1-1/4 cup heavy whipping cream

1/4 cup sour cream

1 teaspoon instant coffee granules

2 teaspoons vanilla extract

Melt butter in a large saucepan over medium heat. Stir in sugar, cocoa, and salt. Mixture will be thick and grainy. Combine heavy cream, sour cream, and instant coffee until smooth. Gradually add cream mixture to chocolate until blended and smooth. Cook until the sugar has dissolved and the mixture is smooth and hot to the touch, 6-8 minutes. Do not boil.

Off heat, add vanilla. Cool icing at room temperature until spreadable, 2-3 hours (Icing me be chilled until completely cold, then warmed gently in microwave until spreadable. Heat at high power in 20-second intervals, stirring well after each interval.)

Posted in Cakes, Desserts | Comments Off

Fried Catfish and Hush Puppies

As a youngster growing up during the Great Depression in the Tennessee hills, once in awhile we could count on having a mess of catfish and hush puppies for dinner. My mother fried them with her wood-burning kitchen stove in iron skillets. The deep-fried food can now be found at “Fast Food Restaurants.” But either way, fried food is delicious. The medical people tell us that fried food is not good for us. I say it taste good and I am 85 years old. None of us can expect to live forever. I also say; “enjoy what you like while living on Earth. We never know which way we will go after death.” We also caught trout, pike and perch from Saw Creek which was adjacent to our farm. My mama used the same frying method as she did with catfish. 

FRIED CATFISH

dscn1795

1 cup white cornmeal

6 (1/2-pound catfish, fillets, washed in cold water and patted dry

Salt and pepper

Vegetable shortening

Lemon wedges, for serving

   Melt enough shortening in a large skillet or Dutch oven over medium heat to reach 3/4 inch.

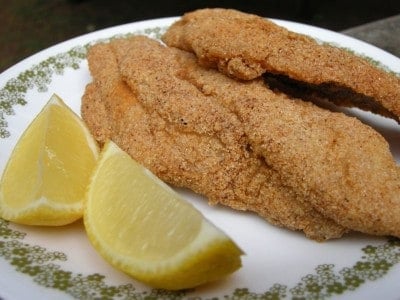
   Meanwhile, pour the cornmeal onto a platter or shallow dish. Season both sides of the fillets with salt and pepper, and then dredge in the cornmeal, shaking off any excess. Gently slide the fillets into the skillet when the fat is hot but not smoking, being careful not to crowd the skillet. Fry, in batches until crisp and golden brown, about 4 minutes. Turn the fillets over and fry 4 minutes more. Transfer the fillets to clean paper bags or a paper towel-lined platter with a slotted spoon. Serve with the lemon wedges.

<><><><><><><><><>

Hush Puppies are to fried fish what butter is to a biscuit. You just can’t have one without the other. The story goes that “Hush. Puppies” is what camp cooks shouted to the yelping hound dogs when they tossed them the fried scraps from their skillets. Whatever their origin, they are easy as pie to make – just whip up the batter and drop it by the spoonful into piping-hot fat. I like to fry them in the same fat that was used frying the fish. In the old day, we used Lard which was a byproduct from butchering our hogs.

HUSH PUPPIES

 Chesapeake Bay Hush Puppies

1-1/2 cups self-rising white cornmeal

3/4 cup self-rising flour

1 teaspoon sugar

1 egg

1 onion, chopped

1 cup buttermilk

Vegetable shortening, for frying

   Combine the cornmeal, flour, and sugar in a medium bowl. Add the egg and onion and stir until combined. Gradually stir in the buttermilk, adding enough to make a thick batter that will easily drop from a spoon.

   Meanwhile, heat enough oil in a deep skillet or Dutch oven to reach 2-1/2 to 3 inches. When the fat is hot enough (about 375) degrees on a deep fry thermometer), drop in the batter by the teaspoonful. Fry, turning occasionally, until the Hush Puppies are golden brown. Transfer with a slotted spoon to a paper towel-lined plate. Serve warm.

Posted in Country Cookin', Entrees, Fish | Comments Off

Raisin Pie

WHAT ARE RAISINS? Raisins are simply dried sweet grapes, of course. Until medieval times, raisins were the second in choice as a sweetener, honeybeing the top choice. At one time in ancient Rome, raisins were considered so valuable that two jars could buy a slave. In the 13th century, Damascus had quite a reputation for their sweet raisins.The majority of the world’s supply of raisins comes from California, dried from Thompson seedless (95 percent), muscadine, or Black Corinth (Zante) grapes. In 1873, California suffered a devastating drought which literally dried the grapes on the vine. Looking to recoup some of the grape crop, an enterprising marketer in San Francisco sold the dried and shriveled grapes as “Peruvian Delicacies,” and the California raisin industry was off and running.

Most raisins are dried naturally by the sun right in the vineyards, although some are mechanically dehydrated. Once sun-dried, a process taking two to four weeks, they are then graded, cleaned, and packed. Some raisins are kept golden in color by the use of sulfur dioxide (sulfites).

RAISIN PIE


3 cups raisins

Boiling water

1 cup sugar

1/4 cup all-purpose flour

Grated zest of 1 lemon

1 teaspoon vanilla extract

1 tablespoon butter

1/4 teaspoon ground nutmeg

Whipping cream, for garnish


1.)   Roll out one crust and line an 8-inch pie plate with it. Roll out the second crust and set aside.

2.)   Place the raisins in a medium bowl and cover with boiling water. Soak for 15 minutes. Drain and return raisins to the bowl.

3.)   Add the sugar, flour, lemon zest, and vanilla to the raisins. Stir until thoroughly combined and set aside until the mixture thickens, about 10 minutes.

4.)   Dump the raisins into the prepared pie plate. Dot with the butter and season with the nutmeg. Top the raisins with the second pie crust, crimp the edges, and trim the excess dough. Pierce the top crust all over with the tines of a fork. Refrigerate for 30 minutes.

5.)   While the pie is chilling, preheat the oven to 425 degrees.

6.)   Place the pie on a baking sheet and bake 20 minutes. Reduce the heat to 350 degrees and bake until golden, 30 to 40 minutes more. If the pie crust begins to darken too much, cover the edge with a collar of aluminum foil.

7.)   Transfer the pie to a wire rack to cool. Serve warm toped with whipping cream.

 
Posted in Desserts, Pies | Comments Off

Chicken and Dumplings

Chicken and Dumplings


Irish Chicken and Dumplings picture1

(3-pound) stewing hen

2-1/2 teaspoons salt

3/4 teaspoon black pepper

1 onion, peeled and left whole

1/4 cup chopped celery leaves

2 cups all-purpose flour, plus extra for kneading

1/2 teaspoon baking soda

3 tablespoons vegetable shortening

3/4 cup milk

 1.)   Combine the chicken and 2 teaspoons of the salt with 2 quarts of water in a Dutch oven. Cover and bring to a boil. Reduce the heat to medium and add the pepper, onion, and celery leaves. Simmer the chicken until the meat falls away from the bone.

2.)   Remove the chicken and onion from the pot, and strain out the celery leaves. Discard the onion and celery leaves, and set the chicken aside to cool.

3.)   When the chicken is cool enough to handle, remove the meat from the bones and cut into 1-inch pieces. Set aside. Discard the skin and bones. Meanwhile, raise the heat to high and bring the broth to a boil.

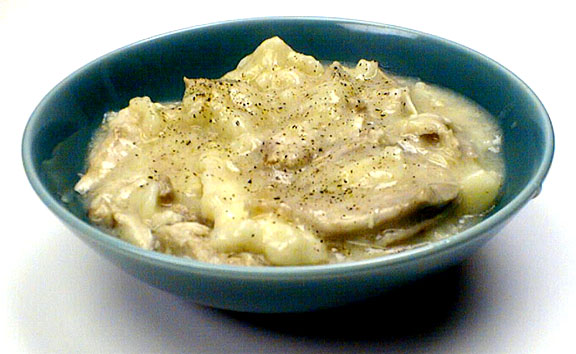
4.)   Combine the flour, baking soda, and the remaining 1/2 teaspoon of salt in a medium bowl. Cut in the shortening with a fork and knife or a pastry cutter until the mixture resembles course crumbs. Gradually stir in the milk until the dough is moist. Turn the dough out onto a floured surface and lightly knead for about 5 minutes. Roll out to 1/2-inch thickness and cut unto 1-1/2 inch squares. Drop the pieces of dough into the boiling broth. Reduce the heat to low, cover, and cook for 10 minutes. Stir gently. Add the chicken back to the pot, stir, and cook until the chicken is heated through, about 8 minutes. Serve warm – Serves 6.

 
Posted in Casseroles, Chicken, Country Cookin', Entrees | Comments Off

History of Florida’s Key Lime

History of Florida’s Key Lime
 
Key limes are the pink flamingos of Florida food, and they are a celebrated part of local color. Key West, Florida, is famous for its fabulous key lime pie, one of America’s best-loved regional dishes. Every restaurant in the Florida Keys, and especially in the city of Key West, serves this wonderful pie. There seems to be a key lime pie for every palate, with numerous versions made throughout the region. This pie is considered the official pie of the Florida Keys.

Aficionados of key lime pies argue endlessly about the proper way to make one. Graham-cracker or pastry crust? Meringue on top or whipped cream, or neither? Cooked or uncooked filling? The one thing that they do agrees on is that under no circumstances should you ever add green food coloring. The filling of authentic key lime pie is a light yellow.
As to who made the first key lime pie, no one really knows for sure as it has never been documented. The most likely story is that William Curry (1821-1896), a ship salvager and Florida’s first self-made millionaire (commonly referred to as rich Bill), had a cook that was simply know as Aunt Sally. It was Aunt Sally who created the pie in the late 1800s. Some historians think that Aunt Sally didn’t create the Key Lime Pie, but probably perfected a delicacy that was the creation of area fishermen. William Curry built a lavish mansion for his family in 1855 that still is being used today as the Curry Mansion Inn.
It was not until the 1930s that the first recipes were written down. Until then everyone just knew how to make the pie. No fresh milk, no refrigeration, and no ice was available in the Keys until the arrival of tank trucks with the opening of the Overseas Highway in 1930. Because of this lack of milk, local cooks had to rely on canned sweetened condensed milk, which was invented in 1856 by Gail Borden. Key lime may be the star ingredient of the key lime pie, but it is the sweetened condensed milk that makes it so smooth and delicious.
 
The key lime tree, which is native to Malaysia, probably first arrived in the Florida Keys in the 1500s with the Spanish. Key limes look like confused lemons, as they are smaller than a golf ball with yellow-green skin that is sometimes splotched with brown. They are also know as Mexican or West Indian limes. When a hurricane in 1926 wiped out the key lime plantations in South Florida, growers replanted with Persian limes, which are easier to pick and to transport. Today the key lime is almost a phantom and any remaining trees are only found in back yards and their fruit never leave the Florida Keys. Key limes are also grown for commercial use in the Miami area.
In 1965, Florida State Representative Bernie Papy, Jr. introduced legislation calling for a $100 fine to be levied against anyone advertising key lime pie that is not made with key limes. The bill did not pass
In 1994, the State Legislature officially recognized Key lime pie as an important symbol of Florida. The road to becoming the official state pie, was not an easy one. Since the 1980s, North Florida lawmakers have debated that a pie made of pecans, grown in Florida, would better reflect the state’s history. House Bill 453 and Senate Bill 676 of the Florida Legislature’s Regular 2006 Session made the Key Lime Pie the official Florida state pie as of July 1, 2006.
Source: Bahama Currys
<> <> <>
ORIGINAL FLORIDA KEY LIME PIE RECIPE – FLORIDA’S OFFICIAL STATE PIE…
1 (14 oz) can sweetened condensed milk
4 egg yolks
4 oz. Florida Key West Key Lime Juice
9 inch graham cracker pie crust
 
Mix milk and egg yolks completely with electric mixer. Slowly add key lime juice and mix thoroughly. Pour into 9-inch prepared graham cracker pie shell. Bake at 350 degrees for 8 minutes. Turn oven off and crack door. If making meringue, place meringue on hot key lime pie, sealing edges to crust, then toast to a golden brown. Keep a close eye on it. It’ll start to toast real fast. Turn oven off and crack door after browning meringue. If using whipped topping, bake for 10 minutes. Let pie cool before placing in refrigerator. If using whipped topping, place on pie prior to serving and garnish as desired.
Posted in Desserts, Pies | Comments Off

Nassau Grits

Nassau Grits

 
In Pensacola, Florida, you’ll find The Coffee Cup, the place where cops and attorneys, drywall hangers and artists, dilettantes and debutantes gather to eat grits and eggs in the morning.”

An adaptation of The Coffee Cups’ grits recipe appears in Edge’s Southern Belly: The Ultimate Food Lover’s Companion to the South, and that recipe in itself is a riff on one passed on to The Coffee Cup through many hands. Now, it passes to you.

If you’d like to read more about The Coffee Cup and other Southern delights, grab a copy of Southern Belly for yourself.

Ingredients


  • 1/2 pound bacon
  • 1 medium onion, finely chopped
  • 1 bell pepper, seeded and finely chopped
  • 3/4 cup ground or finely chopped ham (about 6 ounces)
  • 1 (14-ounce) can chopped tomatoes
  • 1 teaspoon finely chopped garlic
  • 3/4 cup uncooked white grits
  • Salt and freshly ground black pepper


Procedures

  1. Heat a large skillet over medium heat. Add the bacon and cook, turning once, until crisp, 5 to 7 minutes. Remove to a plate lined with paper towels. Once cooled, crumble into bits and set aside.

  2. Pour off all the bacon drippings except for 2 to 3 tablespoons. Add the onion and bell pepper and saute until the onion is translucent, 3 to 5 minutes. Add the ham, stirring to mix well. Cook, stirring occasionally, for 10 minutes. Add the tomatoes and garlic and reduce the heat to low. Simmer, stirring occasionally, for 30 minutes.

  3. Meanwhile, cook the grits as directed on the package instructions. When they reach a creamy state, stir in the ham and tomato mixture. Taste and adjust for seasoning with salt and pepper. Transfer to a large serving bowl and crumble the bacon over the top. Serve immediately.

Posted in Country Cookin' | Comments Off

Collard Greens with Bacon

Collard Greens with Bacon
 

Chef Noah’s tip: Don’t overcook the bacon. It should be barely brown around the edges and still somewhat raw-looking in the middle. If you like potatoes, throw about 4 into the pot when you add the uncooked collard greens.

Ingredients

  • 4 strips thick-sliced bacon, sliced crosswise into 1/2-inch pieces
  • 1 small yellow onion, chopped
  • 2 garlic cloves, minced
  • 2 tablespoons sugar
  • 1 teaspoon kosher salt
  • 1/2 teaspoon freshly ground black pepper
  • Several dashes hot sauce
  • 1/4 cup apple-cider vinegar
  • 2 pounds collard greens, stems removed, sliced into 3-inch-wide strips (can substitute kale or chard)
  • 1 cup chicken broth (or water)

Method

1 Heat a large skillet on medium heat. Cook the bacon in the skillet until it just begins to brown around the edges, stirring occasionally. Add the onions and cook until they have softened and are just starting to brown.

2 Add the garlic, salt, pepper, sugar and hot sauce. Cook until the garlic becomes fragrant, about a minute. Add the vinegar, bring to a simmer, and cook until the amount of liquid is reduced by half, stirring and scraping up any browned bits from the bottom of the pot.

3 Add the collard greens and the chicken broth (or water) and bring to a simmer. Reduce the temp to medium-low. Cook, stirring occasionally, until the collard greens have wilted and have lost their brightness. Season to taste with additional vinegar and hot sauce. Serve with some of the pan juices from the pan. A hoecake of Southern made white cornbread will complete your supper.

Serves 6 to 8.

Posted in Country Cookin', Vegetables | Comments Off